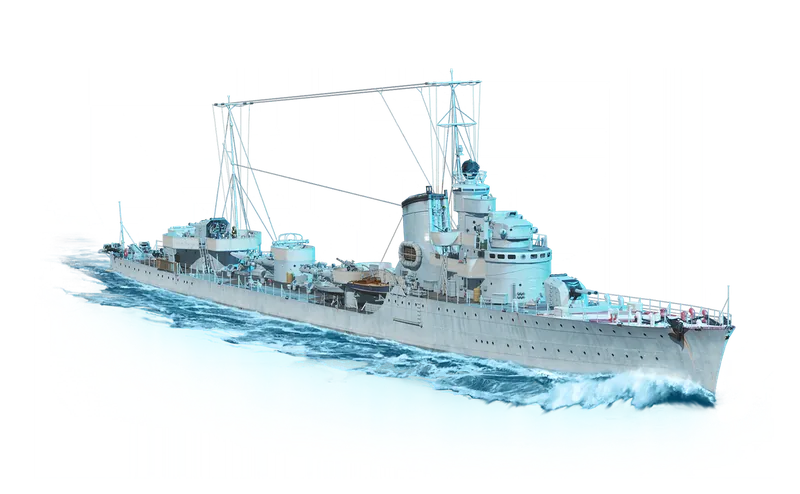
Hit PointsInitial: 10,900 → 13,400
Displacement2,279 t
Hull dimensions ƒ
Length x beam at the waterline, plus draft. Length matters when dodging torpedoes; beam and draft shape how hard the ship is to hit.
Armor range10–10 mm
Plate armor thicknesses10 mm
Armor material/layer entries21
Fire resistance ƒ
stock hull: 1 − 0.8668 fire coefficient = 13.3%; top hull: 1 − 0.8335 fire coefficient = 16.6%. Lowers how often hits set you on fire. It does not reduce the damage a burning fire does per second; fires burn at the full rate on every ship.
Fire duration30 s
Fire damage ƒ
One unattended fire: 0.003 of max HP per second (0.3%) × 30 s = 0.09 of the pool; 0.09 × 13,400 HP = 1,206 HP on this ship. 4 fire points can burn at once.
Flood duration40 s
Flood damage ƒ
One unattended flood: 0.0025 of max HP per second (0.25%) × 40 s = 0.1 of the pool; 0.1 × 13,400 HP = 1,340 HP on this ship.
Torp Reduction ƒ
1 − 0.333 hull torpedo-damage coefficient / 0.333 unprotected baseline = 0%. Reduces torpedo hit damage. It does not affect flooding: floods start as often and tick at the full rate.
Magazine HP ƒ
Per-turret powder-magazine HP, a separate pool from the ship's. Penetrating hits wear it down and the turret is likelier to be knocked out as it falls, so a larger pool keeps the guns firing through punishment that silences a peer's.
Steering gear HP ƒ
Durability of the steering gears. As this pool drops, hits are likelier to jam the rudder; unlike most modules the steering can be knocked out and repaired but is never permanently destroyed.
Repairable: penetration50%
Repairable: steering gear50%
Bow section HP ƒ
Damage saturation pool for the bow: penetrations here deal their normal share until twice this much penetration damage has landed on the section (2 × 2,000 = 4,000), then further hits on it deal half damage. A penetration deals 0.33 × the shell's max damage; once the section is saturated it deals exactly half of that (0.5 × 0.33 = 0.165 × max damage), so a 3,000-damage shell's pen goes from 990 to 495. Overpens (0.1 × max damage) and citadels (1.0 ×) ignore saturation. Pens on the ship's other, unsaturated sections still deal the normal 0.33 ×. A larger pool keeps that part of the ship taking full damage for longer; a small one saturates fast and protects the ship's HP.
Casemate section HP ƒ
This section has no practical saturation cap: every hit here keeps dealing its normal share of damage (on most ships the citadel; on many destroyers the casemate).
Hull section HP ƒ
Damage saturation pool for the hull: penetrations here deal their normal share until twice this much penetration damage has landed on the section (2 × 10,100 = 20,200), then further hits on it deal half damage. A penetration deals 0.33 × the shell's max damage; once the section is saturated it deals exactly half of that (0.5 × 0.33 = 0.165 × max damage), so a 3,000-damage shell's pen goes from 990 to 495. Overpens (0.1 × max damage) and citadels (1.0 ×) ignore saturation. Pens on the ship's other, unsaturated sections still deal the normal 0.33 ×. A larger pool keeps that part of the ship taking full damage for longer; a small one saturates fast and protects the ship's HP.
Superstructure section HP ƒ
Damage saturation pool for the superstructure: penetrations here deal their normal share until twice this much penetration damage has landed on the section (2 × 1,000 = 2,000), then further hits on it deal half damage. A penetration deals 0.33 × the shell's max damage; once the section is saturated it deals exactly half of that (0.5 × 0.33 = 0.165 × max damage), so a 3,000-damage shell's pen goes from 990 to 495. Overpens (0.1 × max damage) and citadels (1.0 ×) ignore saturation. Pens on the ship's other, unsaturated sections still deal the normal 0.33 ×. The superstructure is not exempt: it saturates exactly like the bow and stern, so shells aimed at it stop dealing full damage once this pool is used up. A larger pool keeps that part of the ship taking full damage for longer; a small one saturates fast and protects the ship's HP.
Stern section HP ƒ
Damage saturation pool for the stern: penetrations here deal their normal share until twice this much penetration damage has landed on the section (2 × 1,100 = 2,200), then further hits on it deal half damage. A penetration deals 0.33 × the shell's max damage; once the section is saturated it deals exactly half of that (0.5 × 0.33 = 0.165 × max damage), so a 3,000-damage shell's pen goes from 990 to 495. Overpens (0.1 × max damage) and citadels (1.0 ×) ignore saturation. Pens on the ship's other, unsaturated sections still deal the normal 0.33 ×. A larger pool keeps that part of the ship taking full damage for longer; a small one saturates fast and protects the ship's HP.
ModuleArtillery: 120 mm/50 OTO 1931
Mounts / barrels2 mounts / 4 barrels
Reload time5.8 s
Firing range (base)9 km
Firing range (top fire control)9.9 km
Turret traverse14 °/s
Turret armor6 mm
Turret traverse arcs ƒ
How far each mount can train, in degrees to either side of the mount's own facing. A rear turret with ±150° leaves a 60° blind wedge over the bow; one-sided arcs are wing mounts that cover a single side. The data does not say which way each mount faces, so the arcs are listed per mount without bow/stern angles.
Guns to bear ƒ
180° − 150° (the most restricted aft-facing mount's arc) = 30° off bow; 180° − 152° (the most restricted forward-facing mount's arc) = 28° off stern. How far off the bow (or stern) the ship must angle before every main turret can fire: the widest blind wedge among the rear-facing (or forward-facing) mounts, from each mount's trainable arc.
Shell Grouping (σ)2
Dispersion type ƒ
In practice: the baseline curve for a standard destroyer -- at max range (9.9 km) shells land in an ellipse about 89 m wide and 53 m tall. Also on this curve (225): AL Avrora, AL Yukikaze, AL Z24, Acasta, Achilles, Adriatico, Aigle, Akatsuki, Akizuki, Albany, Allen M. Sumner, Attilio Regolo and 213 more.
Max Horiz Disp ƒ
Horizontal dispersion ellipse width at max range, from the dispersion model:
Max Vert Disp ƒ
Vertical dispersion ellipse height at max range:
Med Horiz Disp ƒ
50%-hit horizontal radius:
Med Vert Disp ƒ
50%-hit vertical radius:
Turret turn time ƒ
180 degrees / 14 deg/s traverse speed = 12.9 s.
Shells/min ƒ
4 broadside guns x 60 / 5.857 s (5.8 s = 41 ticks) base reload = 41.
HE shells
HE alpha1,750
HE Velocity840 m/s
Fire Chance8%
HE fire DPM vs T4 BB23719
Effective HE DPM vs T4 BB95427
HE penetration ƒ
20 mm ≈ 120 mm caliber / 6 (standard HE penetration ratio).
HE full-salvo alpha ƒ
1,750 HE damage x 4 broadside guns = 7,000.
HE DPM ƒ
7,000 HE full-salvo alpha x 60 / 5.857 s (5.8 s = 41 ticks) base reload = 71,707.
Fires/min ƒ
41 shells/min × 0.08 (8% fire chance) = 3.28.
SAP shells
SAP alpha2,600
SAP Velocity840 m/s
SAP Pen (mm)34.2
SAP Min Ricochet60 deg
SAP Guaranteed Ricochet75 deg
SAP Fuse Timer0.03 s
SAP Fuse Threshold25 mm
SAP Fragment Radius ƒ
SAP shell fragment splash radius; the area over which a SAP hit scatters fragment damage. Scales with shell mass (90mm ~ 5, 203mm CA ~ 20-30, 320mm = 175, 406mm = 250, 457mm = 400, max) and is tuned per ship, so two ships with the same SAP caliber can differ (135mm ranges 5-24). Larger value = wider fragment spread per hit.
SAP full-salvo alpha ƒ
2,600 SAP damage x 4 broadside guns = 10,400.
SAP DPM ƒ
10,400 SAP full-salvo alpha x 60 / 5.857 s (5.8 s = 41 ticks) base reload = 106,537.
ModuleTorpedoes: 533 mm tubo lanciasiluri triple
Launchers / tubes2 launchers × 3 tubes = 6 tubes
Reload time80 s
Projectile speed56.0 kt
Range8.01 km
Maximum simulated damage ƒ
Initial: 23,400 × 0.333 = 7,800 → 27,300 × 0.333 = 9,100 (warhead alpha × saturation coefficient, stock → upgraded torpedo). Most targets only intersect one hull section, so a hit transfers about 1/3 of the warhead alpha (2/3 when the warhead blast >= 5000 and the burst reaches a second section). For this ship: . In battle, a hit on the torpedo belt deals the per-hit figure × (1 − the target's torpedo protection %), a bow or stern hit deals it in full, and a torpedo never counts as a citadel hit.
Maximum damage (ammunition) ƒ
27,300 warhead alpha / 3 + 900 blast = 10,000. Warhead alpha / 3 plus the blast addend: the per-torpedo damage figure. The 'Maximum simulated damage' row above applies target geometry to the same warhead.
Torpedo module damage ƒ
Per-torpedo module/blast damage parameter. Most torpedoes carry 500 to 2,000; ships announced by WG as dealing increased module damage carry 9,000 to 12,000, so their hits knock out engines, rudders, and turrets far more often. Comparative figure.
Torpedo detectability1.1 km
Reaction time ƒ
How long a target has to dodge after your torpedo is spotted at its detectability range (lower means less warning): . 2.6855 converts knots to m/s on the game clock. Base value; commander torpedo-concealment skills lower it further.
Flooding chance ƒ
This torpedo carries a flooding-chance value of 1.6 per hit, shown as . Values above 100% are normal: in battle the base chance is scaled down by the target's torpedo protection (the Torp Reduction stat on its Survivability card) and any flood-resistance modifiers, so a value above 100% keeps flooding likely even through partial protection.
Torpedo launcher traverse25 °/s
Launch arcscentreline 264°, 274°
Torp Turn ƒ
Time to rotate the launchers 180 deg: .
Torp Arming180 m
Per-side salvo damage ƒ
One side firing, all torpedoes hitting: per-side tubes x per-torpedo simulated damage = 6 x 9,100 = 54,600. Each hit on the target's torpedo belt is reduced by its torpedo protection %.
AA mount points4
Maximum AA range ƒ
Longest-reaching family on the in-game AA card. Base AirDefense aura max range is 2 km; dual-purpose mount auras extend it.
40 mm/39 Vickers-Terni2×1 40mm
13.2 mm/76 Breda 19312×2 13mm
Guns40 mm/39 Vickers-Terni
Continuous DPS ƒ
Effective DPS: 12 raw aura damage × 3.5 × 1 hit probability = 42 - the same in-game units as the Close-range AA DPS headline.
Range2 km
Guns13.2 mm/76 Breda 1931
Continuous DPS ƒ
Initial: 7 × 3.5 × 0.95 = 23 → 11 × 3.5 × 0.95 = 37. Raw aura damage × 3.5 × hit probability, the same in-game units as the Close-range AA DPS headline.
Range1.2 km
Total DPS in Aura ƒ
Medium 42 + Near 37 = 79

Maneuverability
Engine power44,000 hp
Maximum speed38.0 kt
Turning circle radius590 m
Rudder shift timeInitial: 3.5 s → 2.5 s
Engine power-boost threshold7.0 kt
Engine spool-up time7.7 s
Reverse spool-up time3.8 s
Reverse speed ƒ
top speed / 4 + 4.9 = 38 / 4 + 4.9 = 14.4 kt. Base value; speed modifiers scale it.
Crash stop ƒ
Seconds from top speed to a dead stop after ordering full reverse: reverse power winds in over the reverse spool-up while water drag does most of the braking, using the ship's own reverse-power ratio. The full curve is on the acceleration chart. Full reverse stops about a quarter faster than a plain Stop order from top speed.
Engine boost threshold (reverse) ƒ
Speed below which the engine's built-in power boost applies in reverse.
Acceleration 0-90% ƒ
Time to reach 90% of top speed (34.2 kt of 38.0 kt).
Acceleration 0-99% ƒ
Time to reach 99% of top speed (37.6 kt of 38.0 kt). 99% rather than 100% because true top speed is asymptotic (thrust meets drag), so the last fraction of a knot is never quite gained.
Guns in a full turn ƒ
With the rudder hard over the hull turns 8.4°/s, so a target drifts across the bow at that rate. Turret traverse minus hull turn: 14 − 8.4 = +5.6°/s, so the guns hold the target through the turn. Main Battery Mod. 2 (+20% traverse) and Mod. 3 (−15%) move this line.
Detectability by sea ƒ
Base value, no camouflage. With a Grade IV permanent camo (or any disposable camo): 6.56 km x 0.955 = 6.26 km. Camouflage does not change detectability by air.
With Grade IV camouflage (sea) ƒ
Detectability by sea 6.56 km x 0.955 (Grade IV permanent camo or any disposable camo) = 6.26 km.
Detectability by air3.14 km
Smoke firing penalty2.24 km
Detect when firing (sea) ƒ
max(main battery range, sea detectability 6.56 km) = 9.86 km. Equal to the ship's main battery range (never below base detectability): firing makes you visible to everyone you can reach.
Detect when firing (air) ƒ
Air detectability 3.14 km + gun-firing bloom 2.4 km = 5.54 km. The bloom tracks main-battery caliber 120 mm × 0.020 = 2.4 km.
Detect when on fire (sea) ƒ
Sea detectability 6.56 km + 2.0 km while burning = 8.56 km.
Detect when on fire (air) ƒ
Air detectability 3.14 km + 3.0 km while burning = 6.14 km.
Guaranteed Detect2 km
 Damage Control Party∞ charges · 40 s reload · 5 s active
 Exhaust Smoke Generator3 charges · 120 s reload · 25 s emit / 10 s cloud active · 450 m radius
 Engine Boost3 charges · 120 s reload · 15 s active · +25% speed bonus